I use Photoshop CS3, but I'm sure there are similar things to the tools I use in gimp and other programs.
However, it does require a program that can handle layers.
I will try to go into detail for people with less experience, but please let me know if you need me to elaborate on any step.
How to make Marking and full Recolor Overlays
Markings are most easily done by editing the existing dinosaur images.
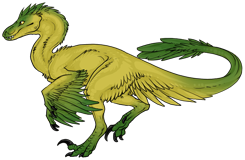
For this tutorial, I will be making a complicated full-body overlay for coelophysis to show some different ways people could use to make markings.
Step 1 Choose Your Color(s)
Go to the Custom Tool in the lab and make dinos in the color(s) you want the markings to be. Save at least one to your computer as a .png file. If you need more than one color, the rest can be copy/pasted over.

In some programs copy/pasting .png images will turn the transparent parts black.
It is very easy to fix though. Ctrl + Left click (or right click -> Select Pixels) the mini-image next to the layer name on the layer with working transparency. That should select everything that is not transparent. Invert the selection with ctrl + shift + i (or Select menu -> inverse.) Then click the layer with the "broken" black background and cut (ctrl + x or Edit menu -> Cut.) This should leave behind the dino with the black backgound gone.

Hurray!
When doing a lot of different markings, or one really complicated one, this is faster than saving a bunch of images and moving them all.
------------------------------------------------------------------------------------------------
Step 2a Create a marking by erasing.
The easiest way to create a simple marking is to simply erase the parts that you don't want to be part of the marking.
It is also helpful to have another dino layer under what you are erasing so you can see what the marking looks like when used.

At this point I've added a background on a different layer.
Once you are finished, turn off or delete all the other layers and save it as a .png image. If you are doing something similar to what I did, you should end up with a strange floating marking missing important parts of a dinosaur. This is good. :D

------------------------------------------------------------------------------------------------
Step 2b Create a marking by drawing and cutting.
It is really hard to do complicated or detailed markings by erasing. This method doesn't work with gradient markings that have soft edges like the belly marking.
Make a new layer over your dino and simply draw the marking on over it. Once you have the markings were you want them to be, ctrl+click the marking layer's little image to select your blobs, and invert the selection. Now select the dino image that is the color you chose for that marking and cut. What you should be left with is the bits of the dino that weren't cut, bits in the shape of your marking.
Save it the same as the eraser method.

Once it's selected, inverted, and cut out of my white coelo layer I'm left with a patchy marking.
------------------------------------------------------------------------------------------------
Step 2c Create a marking by drawing and using a clipping mask.
My favored method by far.
Beneath the dino layer, create a new layer. Right click the name of that new layer, and select "Create Clipping Mask."
The dino layer should appear to vanish, but it is still there. Anything drawn in the new layer will reveal the masked layer above it. This means you can use gradients and draw shapes that are more complex than you could with erasing. Anything that goes "outside the lines" will reveal the color you are drawing in, but this is easily fixed.

To get rid of the color outside the lines, ctrl + click to select the dinosaur layer and invert the selection, and cut on the marking layer. You can right click and Merge Down clipping masks so you have fewer layers if it's a complicated overlay.
------------------------------------------------------------------------------------------------
Step 3 Upload your marking
I see a lot of questions about how the overlay system works, so I thought I would include how to finalize and upload your marking to have it made into an overlay.
....When I get back from lunch. >_>;;
Posted: 27/01/2011 @ 1:23 pm Edited on 27th Feb 12 @ 1:12pm by Ankokou


 EX Art Overlay Tutorial


